May 15, 2010

Make the Visual Studio 2010 IDE colors look like Visual Studio 2008

Make the Visual Studio 2010 IDE colors look like Visual Studio 2008: "

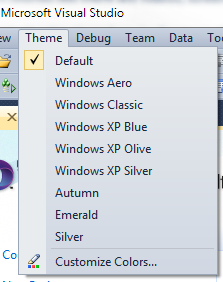
Theme MenuPersonally, I like the new Visual Studio 2010 IDE colors but I got this comment recently from a helpful reader:

Why did the default colour theme for VS 2010 have to be so hideously ugly? Why put all that work into making the most advanced IDE ever, and then present it with a look that screams "we didn't care?" ... An official facelift patch would be nice, if just the 2008 look was applied to 2010.

Well, each to is own. Just like Henry Ford said, "You can have any color you want as long as it's black." Seriously, though, you can change the colors if it makes you happy. Folks feel strongly about their colors, like our friend above.

There's a free Visual Studio Color Theme Editor by Matthew Johnson that you can download and modify the VS IDE theme however you like. Once you've installed it (it's a VSIX - an extension to VS2010 - not an MSI, so don't be scared) there will be a new menu in VS called "theme."

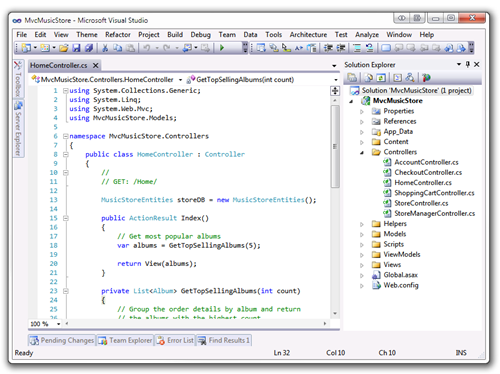
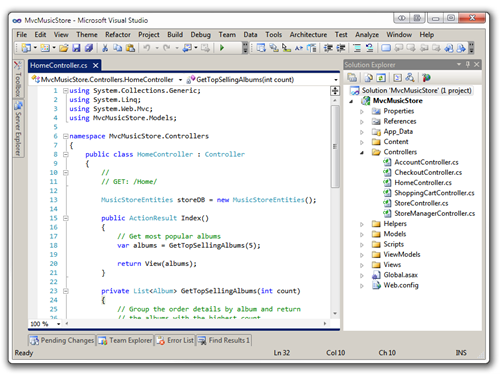
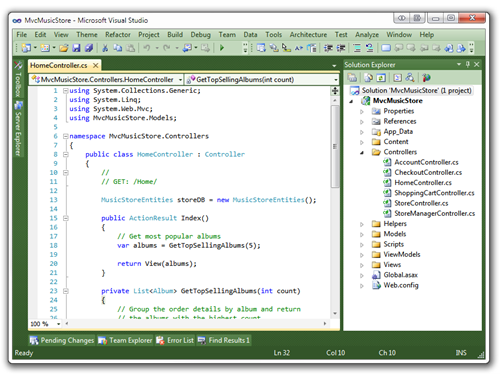
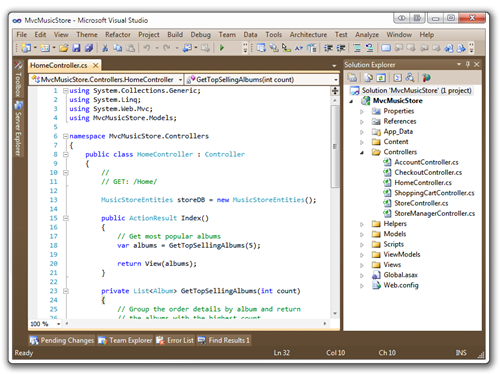
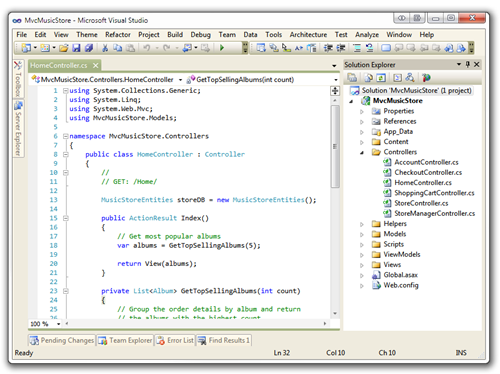
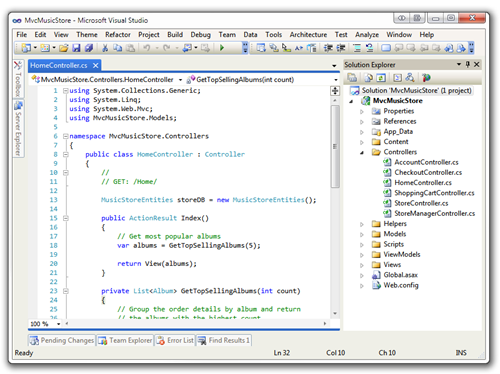
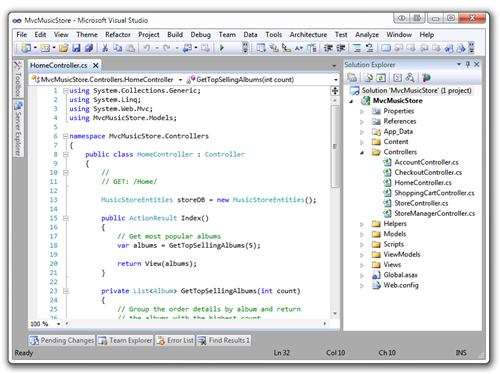
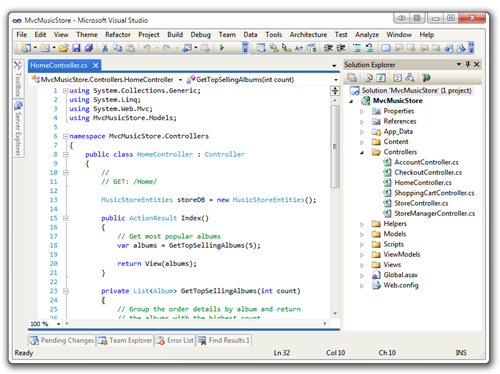
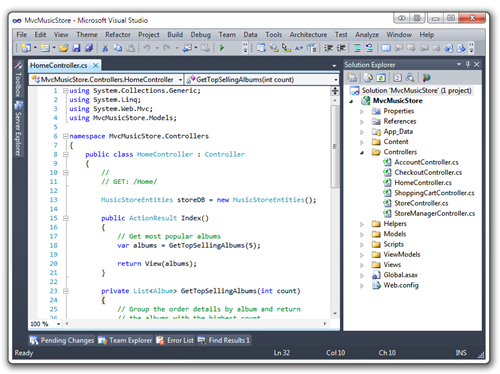
Here's the built in themes. Remember these are VS themes, not Windows themes, so they won't affect Windows colors. Also, this is changing the colors of the IDE itself, not the text editor. You can choose your text styles at http://studiostyles.info.

Windows XP Silver

MvcMusicStore - Microsoft Visual Studio (5)

Windows Classic

MvcMusicStore - Microsoft Visual Studio (9)

Windows XP Emerald

MvcMusicStore - Microsoft Visual Studio (7)

Windows XP Autumn

MvcMusicStore - Microsoft Visual Studio (6)

Windows XP Olive

MvcMusicStore - Microsoft Visual Studio (4)

Windows XP Blue

MvcMusicStore - Microsoft Visual Studio (3)

Windows Aero

MvcMusicStore - Microsoft Visual Studio (2)

Windows XP Blue

MvcMusicStore - Microsoft Visual Studio

Default Visual Studio 2010 Theme

MvcMusicStore - Microsoft Visual Studio (8)

Have fun! You can make your own themes as well and import/export them. Enjoy.


© 2010 Scott Hanselman. All rights reserved.


"

May 14, 2010

30 Tips for Successful Communication as a Remote Worker

30 Tips for Successful Communication as a Remote Worker: "

2715599454_ca105ab726_mAs a Remote Worker I'm always looking for tips and tricks and checklists to make my, ahem, remote working life easier. I've made a cheap Wide Angle Lens so I could better see my co-workers, created a robot cart so they won't forget me, tested 4G cards so I can be online anywhere, switched to Hi-Def Video Cameras for web chat, written articles on how to Collaborate with Remote Employees with Office Communicator 2007 R2 and Phil Haack and I made the HanselPortal, for virtual camaraderie.

Yesterday Jonathan Tuliani, a remote worker in Dublin (or maybe we're remote) on the Azure team sent out a great list of tips for Remote Communications. He and Satya Nadella from Bing and myself and the many other non-Redmond workers sometimes struggle to be effective remotely.

Here's their list of tips, reprinted from an internal mail with permission.

Show consideration

  • Set up calls at mutually workable hours. Avoid blocking calendars with local meetings during shared hours. Fridays are often a poor choice.
  • Start on time. Leaders should set up the bridge or Live Meeting before the call starts. Attendees should always show up on time.
  • If you can't make it, cancel or decline least 18 hours in advance. Changing your plans to attend a non-existent meeting is very frustrating. Think carefully if the recipient will see your cancellation in time (they may be asleep).
  • Assume the best. If the other team isn't meeting your expectations, it's probably because of a lack of awareness or a misunderstanding—not incompetence. Clarify and confirm before drawing conclusions or judging.

Use the right tools

  • Choose the right tool. Office Communicator is great for 1-1s and small group meetings. LiveMeeting is usually better for large group meetings.
  • Use video. Seeing faces increases the quality of the communication. It also helps create focus, preventing people from getting distracted, having side conversations, checking their email, etc.
  • In a group, use a RoundTable. As well as enabling video, the noise-cancelling mics it has are excellent. Make sure all your meeting rooms have one, including the satellite mics.
  • On your own, use a headset. The sound quality for both parties is far superior.
  • Don't use your laptop microphone. Laptop microphones are poor quality and pick up noise from your laptop's fan, disk, and keyboard. Use the mic on your webcam or, better yet, an external mic.
  • Be a black-belt Ninja with the tools. Make sure you can set up and join meetings quickly so that they start on time. Learn all the available features. Set up time to sit with your local team to practice and explore.

Be Heard and Understood

  • Speak clearly and slowly. The connections aren't always clear.
  • Be precise and concise. Help to keep the meeting short and productive.
  • Speak one at a time, otherwise no-one can be heard.
  • Ask for confirmation that the callers heard everything clearly.
  • Sit near the microphone, especially if your voice is soft.
  • Ask for comments. It's hard to break into the conversation over the phone.
  • Avoid jargon and culture-specific phrases. English is not the first language of many people on our teams, and can also vary greatly across cultures.
  • Meet face to face from time to time. Meeting in person builds your knowledge of each other's mannerisms and communication style. Subsequent remote communications are much richer and misunderstandings rarer as a result.

Make meetings effective

  • Pick the right forum. Use meetings rather than long email threads to discuss complex issues. For small meetings, it is often better if everyone is in their own office rather than using a meeting room—this promotes equality between local and remote team members.
  • Share the context and goals. Shared context is critical to clear communication. There are often a lot of assumptions you know in a particular location based on side-conversations, etc.
  • Share a deck. It's much easier to follow the conversation if everyone is looking at the same thing. Even if you are sharing via OC or Live Meeting, send the deck or a link to the deck by email well in advance (home connections can be slow) and call out each slide.
  • Send minutes promptly. After every meeting, send minutes documenting all decisions and including clear actions and owners. Avoid cryptic or overly-concise notes—imagine them being read or reported out by someone who wasn't there, six months later.
  • Record and share brown bags. Brown bags are often at unsociable hours. Recording and sharing helps partner teams as well as your own.

Make Email Work

  • Be clear and precise. It's very easy to misinterpret email, especially across cultures and languages. Re-read your emails before sending.
  • Document everything. Document all decisions - if it's not recorded in email, it didn't happen.
  • Share everything. Use email to share face-to-face hallway, office, lunchtime or post-meeting conversations.
  • Be inclusive. Leave time for other sites to read and reply before closing the issue (as appropriate).
  • Set up inclusive DLs. Having all stakeholders on the appropriate distribution lists is the easiest way to keep from forgetting other sites. Don't hide DL membership.
  • Answer all questions asked. Incomplete answers lead to frustration and wasted time.
  • Avoid unnecessary questions. Ask yourself ‘is it really worth a 24-hour turn-around to answer this question? Can I answer it myself, or ask someone local?' Don't block an important thread with a trivial question.

Related Links


© 2010 Scott Hanselman. All rights reserved.


"

Office 2010 and SharePoint 2010 Training Courses Updated

Office 2010 and SharePoint 2010 Training Courses Updated: "Want to learn how an integrated platform featuring Microsoft Office 2010 and SharePoint 2010 can change the way people work?


Check out the latest updates for the Office 2010 and SharePoint 2010 training courses. Both were updated on today in concert with the Office and SharePoint business launch in New York. You'll find a wide range of topics, including video, sample code, and hands on labs.


To attend an upcoming launch event near you, go here."

May 13, 2010

Fun Visual Studio 2010 Wallpapers

Fun Visual Studio 2010 Wallpapers: "

Two weeks ago I blogged about a cool new site that allows you to download and customize the Visual Studio code editor background and text colors (for both VS 2008 and VS 2010 version). The site also allows you to submit and share your own Visual Studio color schemes with others.

Another new community site has recently launched that allows you to download Visual Studio 2010 themed images that you can use for your Windows desktop background. You can visit the site here: http://vs2010wallpapers.com/ In addition to browsing and downloading Visual Studio themed wallpapers, you can also submit your own into the gallery to share with others.

[In addition to blogging, I am also now using Twitter for quick updates and to share links. Follow me at: twitter.com/scottgu]

Browsing Wallpaper Images

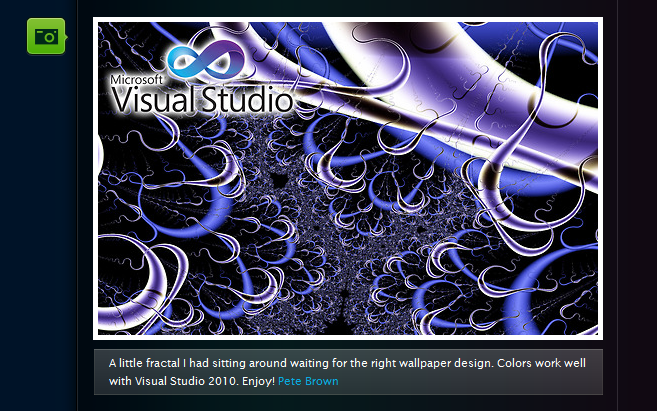
The site has dozens of wallpaper images that you can browse through and choose from. They range from the cool and abstract:

image

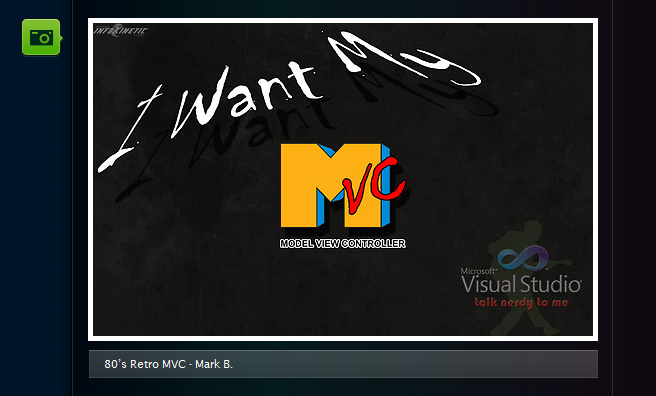
To the fun and silly:

image

image

image

Enabling the Wallpaper Images as your Windows Desktop

You can zoom in on any image (hover over the image and then click the “zoom” button that appears over it) and then download it to be your Windows desktop image. If you visit the site using Internet Explorer, you can also zoom in on the image, then right click on the image and choose the “Set as Background” context menu item to enable it as your Windows desktop.

Note: you want to make sure you download the zoomed-in/high resolution version of the wallpaper to make sure it looks good as the wallpaper on your desktop.

Hope this helps,

Scott

"

Visual Studio 2010 - Help Viewer Power Tool BETA - Help Index and Standalone Help

Visual Studio 2010 - Help Viewer Power Tool BETA - Help Index and Standalone Help: "

The help system changed in Visual Studio 2010. I totally had a "Who Moved My Cheese" moment, as did many folks.

  • Where's my "as I type" Help Index?
  • Where's my separate Help Viewer? I don't want help in my browsers, it clutters my tabs.

If you don't install the Help Documentation at the end of the Visual Studio 2010 setup, you help will be online and shown in your default browser. Personally, I like the idea of an external help viewer. I just saw on the Help Team's blog that they released the Help Viewer Power Tool today. It's an unsupported local content Help Viewer.

First, make sure your Help Content is installed locally, rather than served from the web.

  1. Click Help Manage Help Settings.
  2. Click Choose Online or Local. Select Local, a path, then OK.
  3. Click Install Content from Online (or from Disk)
  4. Select your content by clicking Add on each topic you want, click OK.

When you've got local help content setup, go install the Help Viewer Power Tool. So what do you get?

The Help Viewer Power Tool supports two modes: in-browser and standalone.

  1. The Power Tool defaults to an in-browser experience that adds two additional tabs – Index and Search – to the left pane using a Silverlight control. In addition, the left pane is now fully resizable.
  2. The Power Tool can be configured to provide a standalone experience with three tabs for navigating content: Contents, Search Results, and Index. This mode provides some additional features over the in-browser experience:
    • The help window has its own icon and is easily located in the task bar.· The help window can be pinned to the Win7 Taskbar.
    • F1 queries overlay the previous help topic (eliminates tab proliferation).
    • The standalone window is resizable and can be positioned independently without affecting browser settings.

Here's what your in-browser Help will look like. Notes the Contents, Search Results and Index on the left:

in-browser help

Here's the standalone Help Viewer. Once you've run it, you can also pin it to Explorer in Windows 7.

Standalone Help Brower

How do I switch to standalone mode?

  1. From your system drive, run the following from an elevated command prompt
    (note you might be in \Program files (x86))
    cd \program files\microsoft help viewer\v1.0
    hlpvwpt.exe standaloneviewer=true
  2. Shut down any instances of the Help Library Agent. Right-click on the Help Library Agent icon in the taskbar and select ‘Exit.

How do I switch back to in-browser mode?

  1. From your system drive, run the following from an elevated command prompt:
    cd \program files\microsoft help viewer\v1.0
    hlpvwpt.exe standaloneviewer=false
  2. Shut down any instances of the Help Library Agent. Right-click on the Help Library Agent icon in the taskbar and select ‘Exit.

If you're installing on a non-English system, make sure you read the Readme to make sure your localized help is shown. Also, if you only have IE6, you'll need IE8.

Another way to find the Help Viewer Power Tool

Start Page - Microsoft Visual Studio

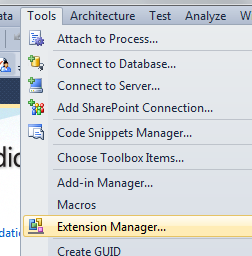
As an aside, you can also just go to the Tools Extension Manager inside VS2010, and query something like "help viewer power" and you can get to the download page from inside VS.

Extension Manager (2)

Related Links

  • How To: Updating multiple VS 2010 installations' Help content with a single download - This technique will show you how to share help between multiple developers via a Shared Drive. This is helpful in constrained bandwidth environments.
    • A comment from my blog: "Also, while the updating feature is great, the downloads appear quite large and if you have a number of machines to update then this can be a slow and bandwidth consuming task, is there any way to download and share the help system updates between multiple installations?
  • Community Created H3Viewer.exe - Alternative VS 2010 help viewer in the style of DExplore. Features a full TOC, full Index, Search and favorites.
  • Keyword Index for Visual Studio 2010 Help Documentation - An unsupported inside-the-IDE Help Client with keyword index.
  • Developer Documentation and Help Forum - Ryan, the developer of this tool, will be watching the forums for your feedback.


© 2010 Scott Hanselman. All rights reserved.


"

May 12, 2010

Pinning Projects and Solutions with Visual Studio 2010

Pinning Projects and Solutions with Visual Studio 2010: "

This is the twenty-fourth in a series of blog posts I’m doing on the VS 2010 and .NET 4 release.

Today’s blog post covers a very small, but still useful, feature of VS 2010 – the ability to “pin” projects and solutions to both the Windows 7 taskbar as well VS 2010 Start Page. This makes it easier to quickly find and open projects in the IDE.

[In addition to blogging, I am also now using Twitter for quick updates and to share links. Follow me at: twitter.com/scottgu]

VS 2010 Jump List on Windows 7 Taskbar

Windows 7 added support for customizing the taskbar at the bottom of your screen. You can “pin” and re-arrange your application icons on it however you want.

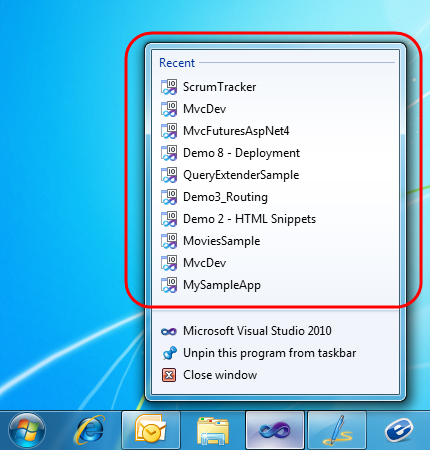
Most developers using Visual Studio 2010 on Windows 7 probably already know that they can “pin” the Visual Studio icon to the Windows 7 taskbar – making it always present. What you might not yet have discovered, though, is that Visual Studio 2010 also exposes a Taskbar “jump list” that you can use to quickly find and load your most recently used projects as well.

To activate this, simply right-click on the VS 2010 icon in the task bar and you’ll see a list of your most recent projects. Clicking one will load it within Visual Studio 2010:
image

Pinning Projects on the VS 2010 Jump List with Windows 7

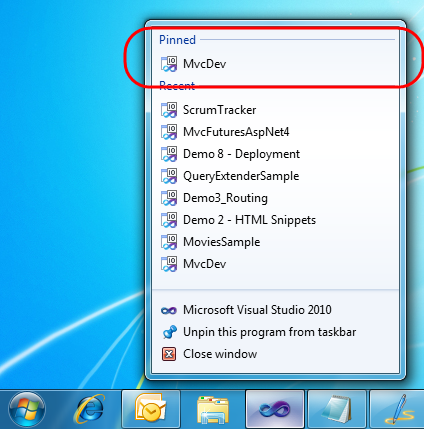
One nice feature also supported by VS 2010 is the ability to optionally “pin” projects to the jump-list as well – which makes them always listed at the top. To enable this, simply hover over the project you want to pin and then click the “pin” icon that appears on the right of it:

image

When you click the pin the project will be added to a new “Pinned” list at the top of the jumplist:
image

This enables you to always display your own list of projects at the top of the list. You can optionally click and drag them to display in any order you want.

Cool Keyboard Trick with Windows 7 Jump Lists

A cool trick that Scott Cate taught me about is the ability to activate Windows 7 jumplists from the keyboard without having to use a mouse.

Simply press the Windows key + the Alt key + [task tray icon index] and the jump list will appear. For example, above VS 2010 is the 4th program icon from the left on my machine – so if I press the Windows Key + Alt + 4 at the same time then the VS jumplist will appear. You can then use the up and down arrows on your keyboard to select the project you want to load from the jumplist.

VS 2010 Start Page and Project Pinning

VS 2010 has a new “start page” that displays by default each time you launch a new instance of Visual Studio. In addition to displaying learning and help resources, it also includes a “Recent Projects” section that you can use to quickly load previous projects that you have recently worked on:

image

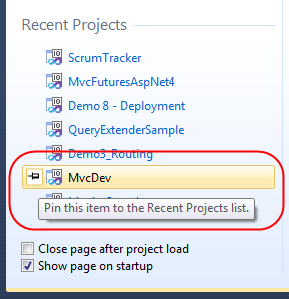
The “Recent Projects” section of the start page also supports the concept of “pinning” a link to projects you want to always keep in the list – regardless of how recently they’ve been accessed.

To “pin” a project to the list you simply select the “pin” icon that appears when you hover over an item within the list:
image

Once you’ve pinned a project to the start page list it will always show up in it (at least until you “unpin” it).

Summary

This project pinning support is a small but nice usability improvement with VS 2010 and can make it easier to quickly find and load projects/solutions. If you work with a lot of projects at the same time it offers a nice shortcut to load them.

Hope this helps,

Scott

"